


Residential roofers perform essential roofing tasks that you’ll find critical to your home’s protection. They’ll start each day with safety equipment checks before conducting thorough roof inspections to assess damage and deterioration. You’ll see them measuring areas, selecting materials, and removing old components. They’ll install weather barriers, apply shingles, manage ventilation systems, and handle emergency repairs. Understanding their complete scope of work reveals the complexity of proper roof installation and maintenance.
Safety Protocols and Equipment Preparation
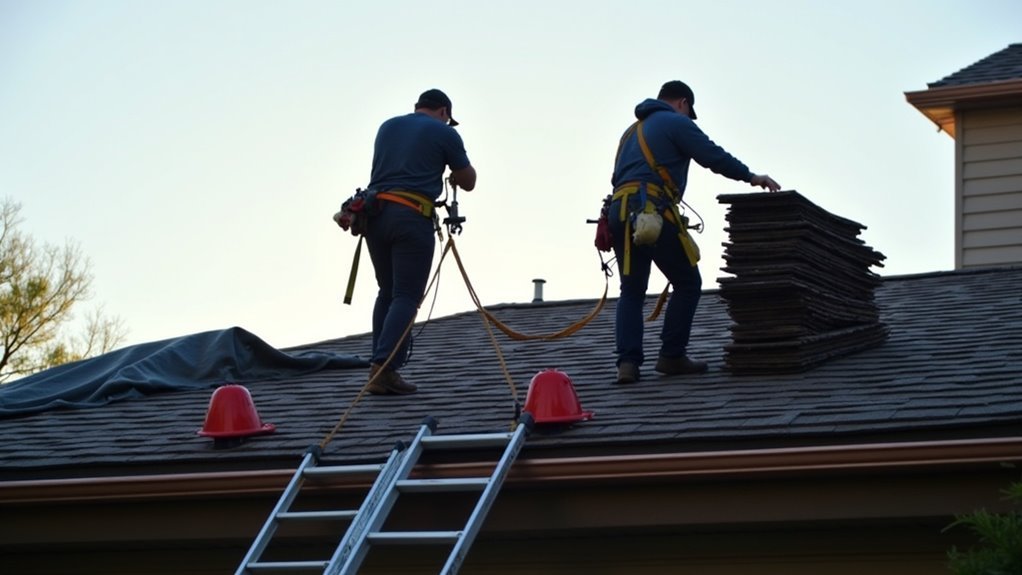
Before ascending any residential roof, rigorous safety protocols and proper equipment preparation are essential to prevent accidents and guarantee efficient workflow. You’ll need to conduct a thorough site safety assessment, checking for hazards like power lines, unstable structures, or adverse weather conditions.
Your personal protective equipment must include OSHA-approved safety harnesses, non-slip boots, and proper fall protection systems. You’ll need to inspect and secure all anchoring points, ensuring they can support at least 5,000 pounds of force. Set up your ladder at the correct angle (4:1 ratio) and extend it three feet above the roof’s edge. Verify that all tools are in working order, properly calibrated, and safely stored in your tool belt or designated carrying equipment.
Roof Inspections and Damage Assessment
Once you’ve safely accessed the roof, a systematic inspection process begins with a thorough exterior examination to identify visible damage and potential structural issues. You’ll conduct a detailed roof structure analysis, checking for sagging areas, compromised decking, and load-bearing concerns. During the roofing material assessment, you’ll document specific damage types and their severity.
| Inspection Area | Key Indicators |
|---|---|
| Shingles | Curling, missing, granule loss |
| Flashing | Rust, separation, holes |
| Gutters | Debris, misalignment, leaks |
| Ventilation | Blocked vents, moisture buildup |
| Underlayment | Water stains, rot, deterioration |
You’ll need to measure affected areas, photograph evidence, and evaluate whether repairs or replacement are necessary. This assessment helps determine appropriate solutions and provides documentation for insurance claims or warranty purposes.
Material Selection and Measurement

Accurate material calculations and measurements form the foundation of every successful roofing project, requiring you to determine both the total square footage and the number of roofing squares needed. You’ll need to match your chosen shingle type whether architectural, 3-tab, or specialty – to the roof’s pitch and your local climate conditions. To guarantee adequate coverage, you must factor in waste percentages, account for starter strips and ridge caps, and include extra materials for complex roof features like valleys and dormers.
Calculating Material Requirements
Determining precise material quantities stands as a critical initial step in any roofing project, directly impacting both cost estimates and project timelines. You’ll need to calculate square footage by measuring roof slope and evaluating roof dimensions, then add an industry-standard waste factor of 10-15% to account for overlaps and cuts.
To obtain accurate measurements, you’ll factor in valleys, hips, ridges, and penetrations like chimneys or vents. When calculating shingle requirements, convert the total square footage into “squares” (100 square feet per square). You’ll also need to determine quantities for underlayment, flashing, drip edge, and fasteners. For underlayment, plan one roll per 4 squares of roofing, while flashing requirements depend on the number of roof penetrations and valleys.
Matching Shingle Types
Selecting the right shingle type requires careful consideration of multiple factors, including the roof’s pitch, local climate conditions, and architectural style of the home. You’ll need to assess whether architectural, three-tab, or specialty shingles best suit your project’s requirements.
When matching color patterns, you’ll want to examine existing shingles under different lighting conditions to guarantee accurate color selection. It’s vital to account for weathering and UV exposure that may have altered the original shade. For seamless repairs, focus on blending shingle textures by aligning the new materials’ thickness, granule size, and surface pattern with the existing roof sections. You’ll also need to verify that your chosen shingles meet local building codes and manufacturer warranties for your specific roof slope and environmental conditions.
Removal of Old Roofing Components
Before installing new roofing materials, residential roofers must systematically remove existing shingles, underlayment, flashing, and any damaged decking. The roof demolition process begins at the ridge cap and progresses downward, using specialized pry bars and roofing shovels to lift and remove old materials while protecting surrounding gutters and landscaping.
You’ll notice roofers inspect the exposed decking for signs of water damage, rot, or structural weakness as they work. They’ll also remove and evaluate all flashing around chimneys, vents, and valleys to ascertain what needs replacement. During this phase, they’ll set up proper disposal methods, including positioning a roll-off dumpster strategically near the work area to efficiently collect and transport debris. This systematic removal guarantees a clean foundation for the new roofing system.
Installation of Weather Barriers and Underlayment
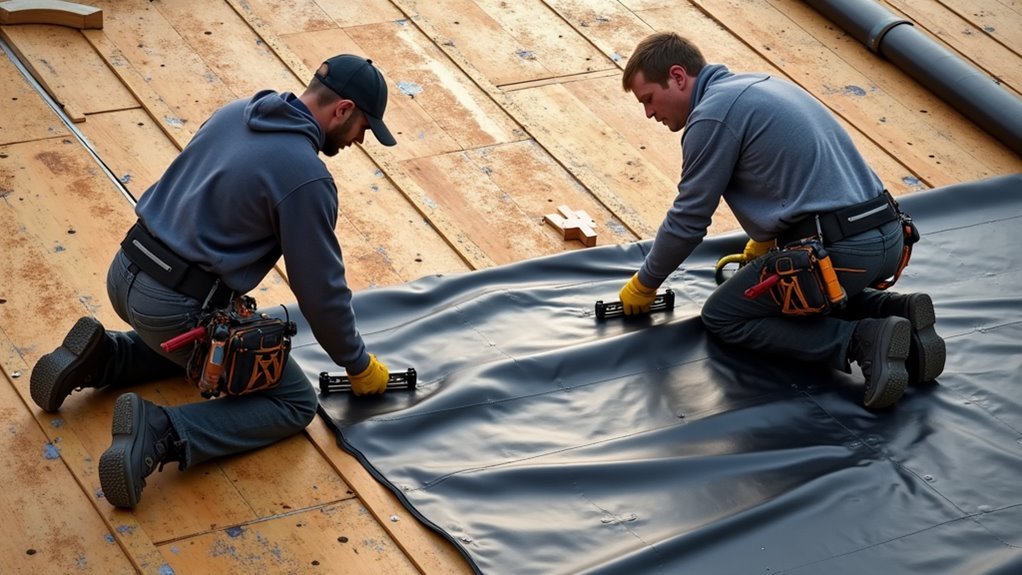
Weather barriers and underlayment create critical protection between your roof deck and shingles, with synthetic options like polypropylene sheets offering superior water resistance compared to traditional felt paper. You’ll need to install these protective layers in overlapping rows from the bottom edge upward, ensuring proper integration with flashings and maintaining minimum overlap requirements specified by manufacturers. When installing synthetic underlayment, you must secure it with plastic cap nails at manufacturer-specified intervals and verify complete coverage of all roof deck areas, including valleys and penetrations.
Weather Barrier Types Explained
The installation of weather barriers and underlayment represents a critical layer of defense against moisture infiltration in residential roofing systems. You’ll find several types of barriers commonly used in modern roofing, each serving specific purposes. Synthetic underlayments offer superior moisture resistance and durability compared to traditional felt paper, while self-adhering ice and water shields provide enhanced protection in vulnerable areas.
Vapor barriers play a pivotal role in managing moisture retention and improving thermal performance by preventing condensation within the roof assembly. Today’s advanced materials include smart vapor barriers that adapt their permeability based on seasonal conditions. When selecting barrier types, you’ll need to deliberate your climate zone, roof pitch, and primary roofing material to guarantee optimal performance and longevity of the entire system.
Proper Underlayment Installation Methods
With your weather barriers selected, proper installation techniques become the foundation of an effective moisture defense system. You’ll need to carefully consider underlayment material specifications and local building codes before beginning the installation process. Recollect that proper underlayment installation techniques vary based on roof pitch, climate conditions, and primary roofing material.
- Start at the eaves and work upward, ensuring each course overlaps the lower layer by at least 6 inches for maximum protection
- Secure underlayment with plastic cap nails at manufacturer-specified intervals, avoiding over-driving that could compromise material integrity
- Install metal drip edges along eaves and rakes before laying underlayment to prevent water infiltration
- Create proper overlaps at valleys and ridges, using additional layers of underlayment material for augmented protection in these vulnerable areas
Shingle Application and Flashing Installation
Proper shingle application and flashing installation form the backbone of a watertight roofing system. You’ll need to carefully overlap each shingle row, maintaining consistent exposure and nailing patterns to prevent water intrusion. Start at the eaves and work upward, guaranteeing each course aligns with manufacturer specifications.
When installing flashing, you’ll encounter different flashing material types, including aluminum, copper, and galvanized steel. Each requires specific flashing sealing techniques at roof penetrations, valleys, and wall intersections. You’ll need to integrate step flashing behind siding, install continuous pieces in valleys, and properly seal vent pipe flanges. Critical areas include chimney flashing, where you’ll create a watertight seal using both base and counter flashing methods. Precise measurements and proper overlapping assure long-term protection against water damage.
Ventilation System Management
Maintaining adequate roof ventilation requires careful attention to both intake and exhaust airflow systems throughout the attic space. You’ll need to perform regular ventilation efficiency assessments to guarantee your home’s HVAC system maintenance aligns with proper airflow standards. Professional roofers coordinate with HVAC specialists to optimize ventilation performance while protecting the roof’s structural integrity.
Proper roof ventilation depends on coordinated airflow systems and regular assessments to maintain structural integrity and optimal HVAC performance.
- Calculate the required net free ventilation area based on your attic’s square footage and local building codes
- Install ridge vents, soffit vents, and gable vents in strategic locations to create proper air circulation
- Check existing vents for blockages from insulation, debris, or pest intrusion that could impair airflow
- Monitor humidity levels and temperature differentials to prevent condensation buildup and potential moisture damage
These ventilation management practices help extend your roof’s lifespan while improving your home’s energy efficiency.
Emergency Repairs and Leak Resolution
Even well-ventilated roofs can experience sudden damage that requires immediate attention. When emergency situations arise, you’ll need to quickly assess the damage and implement temporary solutions to prevent further interior deterioration. This involves using moisture detection equipment to identify water infiltration points and establishing leak mitigation measures.
You’ll set up emergency tarping, apply rubberized sealants, or install temporary patches to protect the structure until permanent repairs can be made. During storms, you’ll respond to urgent calls, securing loose materials and addressing impact damage from fallen branches or debris. You’ll also document the damage thoroughly, collect evidence for insurance claims, and develop detailed repair plans. Critical to success is your ability to work efficiently under pressure while maintaining safety protocols.
Quality Control and Project Documentation
Successful roofing projects depend on rigorous quality control measures and painstaking documentation throughout each phase of installation. You’ll need to follow strict quality assurance procedures while maintaining detailed records of materials, techniques, and inspections. Documentation organization guarantees you’re tracking every critical component of the project, from initial assessment to final walkthrough.
- Photograph roof conditions before, during, and after installation to document the entire process and verify proper technique
- Record material batch numbers, warranty information, and installation dates for future reference
- Complete detailed checklists for each phase of installation, verifying proper overlap, nail placement, and flashing details
- Maintain organized digital and physical files of permits, contracts, material specifications, and inspection reports for easy retrieval and compliance verification
Frequently Asked Questions
How Long Does a Typical Residential Roof Installation Take to Complete?
Your roof installation timeline typically ranges from 1-4 days, though roof material considerations markedly impact the duration. You’ll find asphalt shingle installations complete in 1-2 days, while metal, slate, or tile roofing projects can extend to 3-4 days. Your roofing project timeline may lengthen due to factors like home size, roof complexity, weather conditions, and necessary repairs to the underlying structure. Most standard 2,000-square-foot homes require 2 full workdays.
What Happens if It Rains During My Scheduled Roof Installation?
If it rains during your scheduled roof installation, your roofing team will immediately stop work and secure the site with tarps to protect your home’s interior. Dealing with unexpected weather is a common challenge, but professional roofers plan ahead with weather monitoring and temporary coverage solutions. You’ll experience a delay in the project timeline until conditions are dry and safe for work to resume, typically 24-48 hours after the rain stops.
Do Roofers Work During Winter Months?
Yes, roofers do work during winter months, but they’ll carefully assess weather conditions before proceeding. They cope with winter weather by using specialized equipment and materials that function effectively in cold temperatures. You’ll find they’re especially mindful to maintain roof safety by clearing snow and ice before work begins, using proper fall protection, and ensuring shingles aren’t too cold for proper adhesion. They’ll typically avoid working during active snowfall or when surfaces are icy.
Can I Stay in My Home While the Roof Is Being Replaced?
Yes, you can stay in your home during a roof replacement, but you’ll need to prepare for some disruption. To stay comfortable, consider relocating pets and moving vehicles away from the work zone. You’ll experience significant noise, vibrations, and potential debris falling around your home’s perimeter. While most roof replacements take 1-3 days, it’s advisable to minimize time spent in upstairs rooms during active work hours to avoid dust and construction disturbances.
How Often Should I Schedule Professional Roof Maintenance?
You should schedule professional roof inspections twice a year, typically in spring and fall, to maintain your roof’s integrity. This seasonal upkeep schedule allows experts to identify potential issues before they become major problems. If you live in an area with extreme weather conditions or your roof is over 10 years old, you’ll want to increase your roof inspection frequency to quarterly checks. Don’t forget to schedule supplementary inspections after severe storms.