


As a solar roofer, you’ll start each day with thorough safety inspections and equipment checks before evaluating roof structures for installation feasibility. You’ll take precise measurements, create digital design layouts, and install mounting hardware while ensuring proper waterproofing. Throughout the day, you’ll connect solar panels to electrical systems, perform voltage testing, and verify system performance. The role combines roofing expertise, electrical knowledge, and structural engineering to deliver efficient solar solutions.
Morning Safety Inspections and Equipment Checks
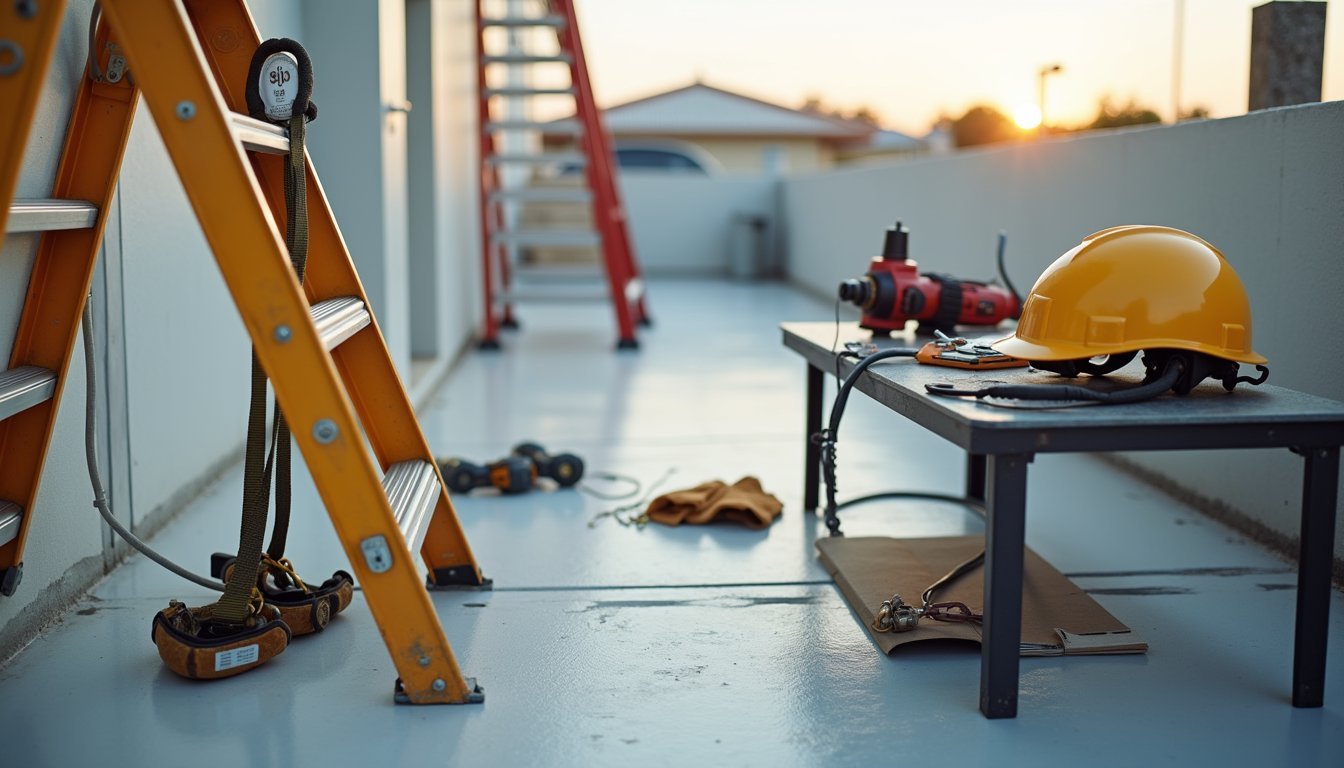
Before climbing onto any roof, solar installers conduct thorough safety inspections and equipment checks to ascertain all tools and safety gear meet operational standards. You’ll start by examining your personal protective equipment (PPE), including harnesses, lanyards, and anchoring systems. Each component must be free from wear, damage, or defects.
Next, you’ll participate in crew coordination meetings to review the day’s installation plans and safety protocols. During equipment maintenance checks, you’ll verify that power tools, measuring devices, and mounting hardware are properly calibrated and functioning. You’ll also inspect ladders for stability, confirm lift equipment is operational, and ascertain all electrical testing instruments display accurate readings. These systematic morning procedures help prevent accidents and confirm efficient workflow throughout the installation process.
Roof Structure Assessment and Measurements
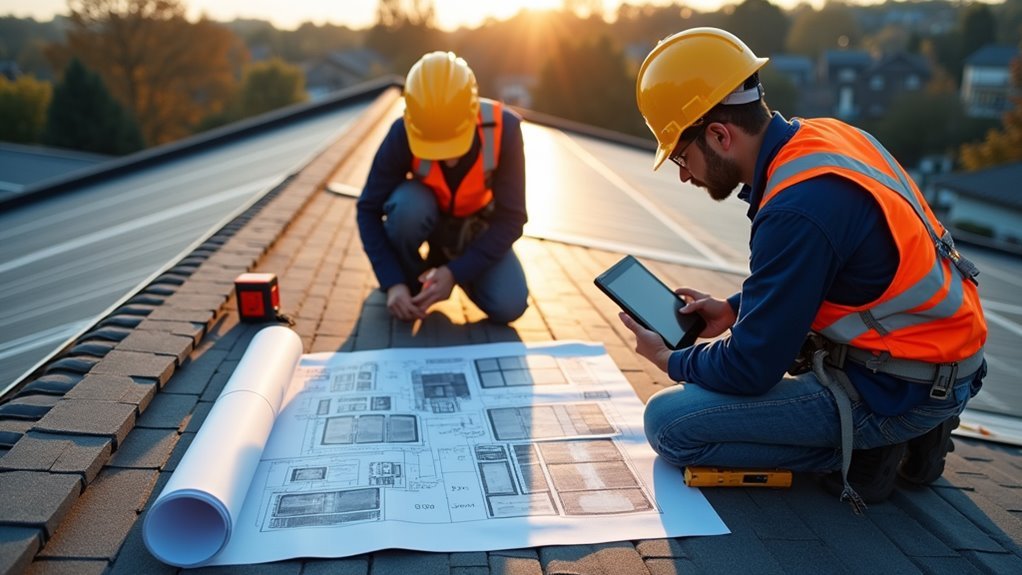
With safety protocols complete, solar roofers move to conducting thorough structural assessments of the installation site. You’ll examine the roof’s load-bearing capacity, evaluate rafter spacing, and document the condition of existing shingles and underlayment.
During the roofing material evaluation, you’ll identify the type and age of current materials while checking for signs of water damage or deterioration. The structural integrity analysis requires measuring roof pitch, determining ideal panel placement, and calculating weight distribution for the solar array.
You’ll take precise measurements of the available installation space, noting locations of vents, chimneys, and other obstructions. Using specialized tools, you’ll assess the roof’s orientation to the sun and shade patterns, ensuring maximum solar exposure for ideal system performance.
Solar Panel Layout Design and Planning
You’ll need to calculate the total square footage available on suitable roof surfaces to determine how many solar panels can be installed. Using specialized software, you’ll create detailed digital layout plans that account for required setbacks, vents, and other roof obstructions while maximizing energy production potential. Your panel positioning strategy must consider factors like sun exposure angles, shade patterns, and local building codes to achieve ideal system performance.
Assessing Roof Space Requirements
Solar roofers carefully analyze available roof space to determine ideal panel placement and system capacity. They evaluate roof orientation and roof shading conditions to maximize solar exposure and energy production potential.
When appraising roof requirements, solar roofers consider these critical factors:
- Usable square footage after accounting for setbacks, vents, and other obstructions
- Structural integrity and load-bearing capacity of existing roof framework
- Distance between rafters and overall roof pitch angle
- Clear access paths for maintenance and emergency personnel
- Minimum spacing requirements between panels for proper ventilation
The assessment process involves precise measurements and calculations to guarantee optimal system performance. You’ll find that experienced solar roofers use specialized software tools and thermal imaging equipment to create detailed roof analysis reports, helping determine the most efficient panel configuration for your specific installation.
Creating Digital Design Plans
Once the roof assessment is complete, digital design planning becomes an essential phase where roofers translate physical measurements into detailed CAD models and 3D renderings. You’ll find solar roofers utilizing specialized CAD software to create precise layouts that optimize energy production while adhering to local building codes.
During this process, you’ll see professionals applying digital rendering techniques to visualize panel placement, wiring routes, and mounting systems. They’ll factor in shading analysis, ideal tilt angles, and structural load distribution across your roof’s surface. The software helps calculate exact spacing requirements between panels and determines the most efficient configuration for your specific roof geometry.
These digital plans serve as your project’s blueprint, enabling accurate material ordering and providing clear installation guidelines for the construction team.
Optimizing Panel Positioning
Every successful solar installation begins with strategic panel positioning that guarantees energy capture throughout the year. You’ll analyze multiple factors to determine the most efficient layout for your client’s specific roof configuration and local climate conditions.
- Calculate perfect panel tilt angles based on geographical latitude and seasonal sun paths
- Perform detailed shading considerations using solar pathfinder tools to identify potential obstructions
- Map roof dimensions and structural elements to increase available installation space
- Model energy production scenarios across different panel arrangements using specialized software
- Ensure adequate spacing between panels for maintenance access and proper ventilation
Once you’ve identified the ideal positioning, you’ll document the layout specifications in technical drawings, including exact measurements and mounting points. This precise planning ensures maximum system efficiency and simplified installation processes for the construction team.
Electrical System Integration
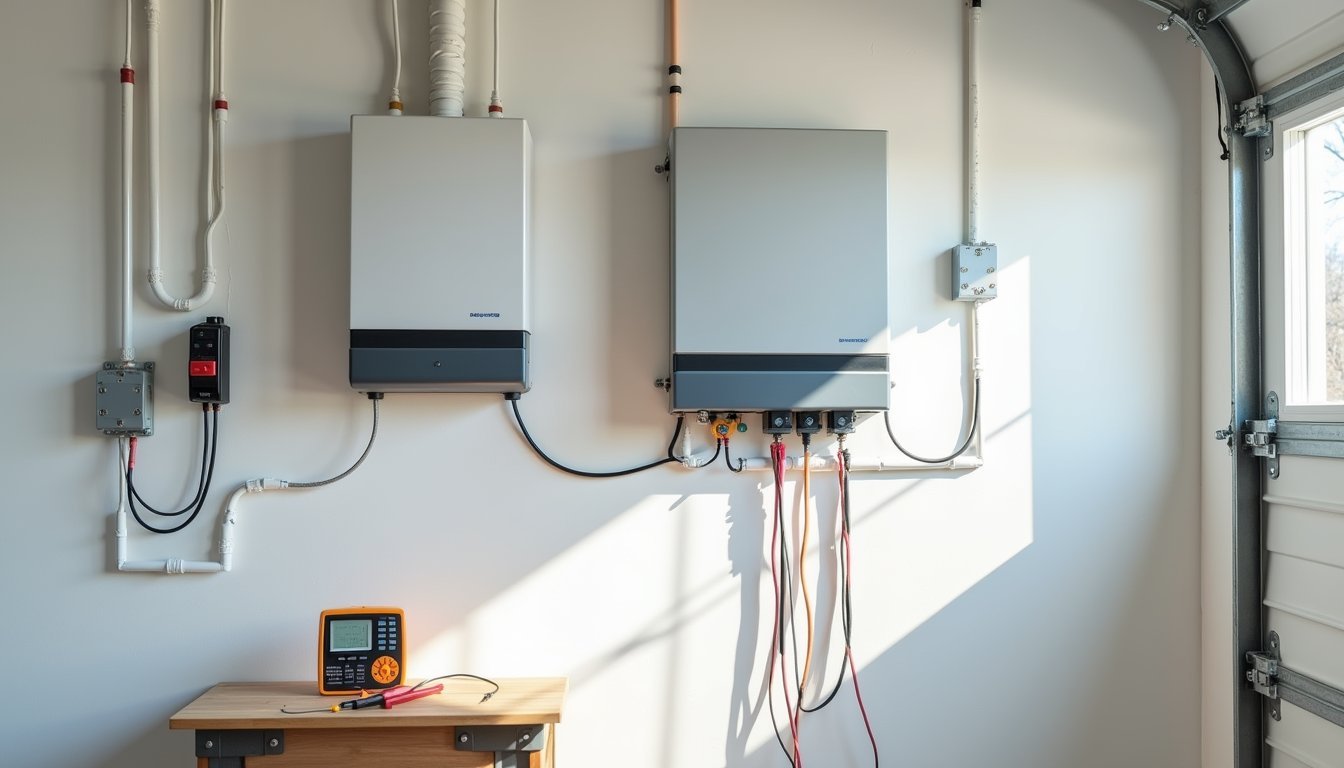
You’ll need to carefully connect the solar arrays to your home’s electrical system through a series of specialized inverters and safety equipment that meets local building codes. Grid integration requires proper wiring configuration, placement of disconnects, and coordination with your utility company to guarantee uninterrupted power flow between your solar system and the main power grid. After completing all connections, you’ll conduct thorough performance testing to verify voltage outputs, check for ground faults, and confirm the system’s general efficiency meets specifications.
Connecting to Power Grid
After installing the solar panels and mounting hardware, connecting the system to the power grid requires precise electrical integration work. You’ll need to coordinate with the local utility company to guarantee compliance with grid interconnection requirements and obtain necessary permits.
- Install a bi-directional meter that tracks both energy consumption and excess power fed back to the grid
- Connect the inverter output to the main electrical service panel through appropriate disconnect switches
- Implement grid-tie protection systems that automatically shut down during power outages
- Configure net metering systems to monitor power flow between your installation and the utility grid
- Test voltage synchronization to validate proper phase matching with utility power
This critical phase requires extensive knowledge of electrical codes, safety protocols, and utility regulations. You’ll perform thorough testing to verify proper system functionality before final utility inspection and approval.
Wiring Solar Panel Arrays
Building upon the grid connection requirements, the complex wiring process of solar panel arrays demands precise attention to detail and advanced electrical expertise. You’ll need to implement specific solar panel wiring methods, including series and parallel configurations, to optimize power output and system efficiency.
Following electrical safety protocols, you’ll connect the panels using appropriate gauge wiring and weatherproof junction boxes. You’ll install micro-inverters or power optimizers at each panel, or route DC power to a central string inverter. Throughout the process, you’ll conduct voltage testing, guarantee proper grounding, and verify polarity at connection points.
You’ll also need to install monitoring systems that track performance data, securing all connections in weathertight conduit while maintaining compliance with National Electrical Code requirements for solar installations.
Testing System Performance
Once the solar panel array is wired and connected, rigorous performance testing becomes essential to verify proper electrical integration and system functionality. You’ll need to conduct thorough evaluations to guarantee optimal performance and safety compliance.
- Use specialized testing equipment to measure voltage output, amperage, and power generation across the system
- Verify proper grounding connections and surge protection functionality while monitoring environmental conditions
- Run diagnostic tests to confirm inverter performance and grid synchronization
- Document baseline efficiency metrics and compare against manufacturer specifications
- Conduct thermal imaging scans to identify potential hot spots or connection issues
When evaluating system efficiency, you’ll analyze data from multiple test points while checking for any anomalies. This systematic approach helps identify potential issues before system activation and ensures the installation meets all required performance standards and safety regulations.
Installation of Mounting Hardware and Supports
Installing mounting hardware and supports requires precise measurements and careful attention to structural integrity. You’ll begin by identifying appropriate mounting locations, carefully marking attachment points that align with the roof’s structural members. Before proceeding, you’ll need to evaluate roof load capacity to ascertain it can support the additional weight of the solar array system.
You’ll then install flashings and mounting brackets, guaranteeing each is properly sealed and waterproofed to prevent future leaks. The process involves drilling pilot holes, securing lag bolts into rafters, and installing the rail system that will hold the solar panels. You must maintain consistent spacing and leveling throughout the installation, using specialized tools to achieve proper torque specifications. Each mounting component must meet local building codes and manufacturer specifications.
Solar Panel Placement and Connection
Solar panels demand methodical placement and precise electrical connections to ideal energy production. You’ll need to focus on proper solar panel orientation to maximize exposure to sunlight throughout the day, ensuring optimal solar panel efficiency.
- Position each panel according to engineered layouts, maintaining specific angles and spacing requirements
- Connect MC4 connectors between panels to create strings, following the system’s wiring diagram
- Install junction boxes and run conduit for the electrical connections that link to the inverter
- Test voltage and amperage readings across panel strings to verify proper connectivity
- Secure all mounting clamps to the specified torque settings while maintaining panel alignment
During installation, you’ll work systematically across the roof, ensuring each panel integrates seamlessly with adjacent units while maintaining proper spacing for ventilation and maintenance access.
Weather Sealing and Waterproofing
While proper panel installation is critical, protecting the roof’s integrity through thorough weather sealing represents a crucial phase of any solar installation. You’ll need to guarantee that all mounting hardware and penetration points are completely sealed against water intrusion using specialized flashing and weatherproof sealants.
You’ll install moisture barriers around each mounting bracket and verify that existing roof insulation remains undisturbed. This includes applying butyl tape or similar waterproofing materials beneath mounting rails and guaranteeing proper overlap with existing roofing materials. You’ll also check that all conduit penetrations are properly sealed and flashed to prevent water from following electrical lines into the structure. The objective is to maintain the roof’s original waterproofing capabilities while accommodating the new solar array components.
System Testing and Quality Control
After completing all weatherproofing measures, you’ll move on to exhaustive system testing and verification procedures. Your quality control process guarantees optimal performance and identifies any potential issues before system activation.
- Perform comprehensive system diagnostics on all electrical connections, inverters, and monitoring equipment
- Conduct voltage and amperage measurements across string configurations to verify proper circuit integration
- Execute component failure analysis on panels, micro-inverters, and power optimizers to detect manufacturing defects
- Test emergency shutdown mechanisms and rapid disconnect systems for code compliance
- Verify data monitoring systems are accurately reporting production metrics and system health
You’ll document all test results in detailed reports, highlighting any components that don’t meet performance specifications. This systematic approach to quality control helps prevent future system failures and ensures your installation meets all safety and performance standards.
Documentation and Client Communication
Throughout the installation process, you’ll maintain detailed documentation and establish clear communication channels with clients to guarantee project transparency and satisfaction. You’ll handle client onboarding by explaining technical specifications, timeline expectations, and maintenance requirements while addressing any concerns they may have about their solar installation.
Your project documentation responsibilities include recording equipment specifications, system layouts, electrical diagrams, and permitting paperwork. You’ll also document each installation phase with photographs and detailed notes about specific challenges or modifications. You must maintain accurate records of safety protocols followed, materials used, and any warranty information. These records prove essential for future maintenance, troubleshooting, and warranty claims. You’ll regularly update clients on project milestones and provide them with thorough system operation manuals upon completion.
Frequently Asked Questions
How Much Training Is Required to Become a Solar Roofer?
You’ll need to complete a combination of hands-on apprenticeship training and specialized certification programs to become a solar roofer. The typical training period ranges from 6 months to 2 years, depending on your chosen path. You’ll learn essential skills through on-site training, including safety protocols, panel installation techniques, and electrical basics. Many employers require you to obtain certifications from organizations like NABCEP (North American Board of Certified Energy Practitioners).
What Happens to Solar Panels During Severe Storms or Hurricanes?
During severe storms or hurricanes, you’ll find that properly installed solar panels can typically withstand high winds up to 140 mph and heavy rainfall. However, you should be aware that flying debris poses the greatest risk of panel damage. If panels are damaged, you’ll experience electricity disruption until repairs are made. Modern panels often include emergency shutdown features that automatically disconnect the system when severe weather threatens, protecting your home’s electrical infrastructure.
How Long Does a Typical Solar Roofing Project Take to Complete?
Your solar roofing project timeline typically ranges from 1-3 days for residential installations, though project timeline assessment depends on several factors. You’ll find that a 2,000-square-foot home usually requires 2 days for completion. Installation process efficiency varies based on roof complexity, system size, and weather conditions. If you’re installing a larger commercial system, you can expect the timeline to extend to 1-2 weeks for complete implementation and final inspection.
Do Solar Roofers Work Year-Round in All Climates?
You’ll find that solar roofers typically work year-round, though weather conditions greatly impact their schedules. In cold climates, they’ll face installation challenges like snow, ice, and frozen materials, while extreme heat can affect equipment performance and worker safety. They’ll often adjust their work hours seasonally, starting earlier on hot summer days and prioritizing indoor prep work during severe weather. Most crews remain productive by strategically planning installations around forecasted conditions.
What’s the Average Salary Range for Experienced Solar Roofers?
As an experienced solar roofer, you can expect to earn between $40,000 to $75,000 annually, depending on your location and expertise level. Your salary will typically increase as you take on more common job responsibilities like crew leadership and system design. Long-term career prospects are promising, with opportunities to advance into project management or start your own solar installation company. Furthermore, you’ll find higher wages in states with active solar initiatives.